Tuesday, March 26, 2013

Trash to Treasure: Part 3-American Girl Doll Furniture


Well, this is Part 3 of the "Trash to Treasure" series. This one isn't quite as long (which should make the folks still reading the last blog reeeeeally happy!)

Remember these drawers?


As I carved my way through them (in this case literally) this project may have been my favorite. The poor middle child's doll has been suffering greatly from a lack of good mattress support. Lying in a makeshift cardboard box bed night after night can really wreak havoc on a gymnast-doll's lower back.

Also, all those tiny outfits were getting hideously wrinkled having to stay in their boxes. The travesty!

Solution? Small doll-sized furniture, of course. I thought of getting a set like the youngest got from Santa: generic doll bunk beds connected to a small armoire. The problem is:

1. The set cost about $60 on sale. 
2. It was pretty flimsy. I mean, it holds up to inanimate doll living, but it really isn't super-sturdy.

To buy the actual American Girl Doll furniture would be about $350 for an armoire and $100-$250 for a bed with bedding.

FOR A DOLL!

Nope.

Looking at these drawers, I figured they would work for a lot less and be really sturdy.

First the armoire:

I took a plain large drawer. The drawers were already white so the priming was done. I sanded the drawer well, wiping it down afterwards with a tack cloth. I used a can of dark brown spray paint (which we had) and sprayed the whole thing until it was well covered. (I forgot to take pictures of the second and third paint steps but did on the bed further down).


Next I sanded the whole thing lightly again and wiped it down with a tack cloth (the tack cloth is a really weird, sticky piece of cheesecloth-but it works!)

I took a can of oops paint we had in the garage ($1.00 from Lowe's) and it was intended to be just the next undercoat. Once it dried, the middle child loved it so it became the topcoat. 

I used the sander and tried to picture where an old piece of furniture would have aged. I lightly sanded some spots and sanded deeper in others, revealing some brown paint, some white and all the way down to the original wood in a few spots. The middle child and youngest kiddos thought it was great.

"It looks like it is really old! That is so cool!"

Yup.

I threw a coat of clear polyurethane on the whole thing and let it dry.

Next I measured the opening of the armoire and cut some floral fabric into two rectangles, each the width of the opening and almost as high. I hemmed three sides and folded the top over again one inch for a rod pocket. I cut two contrasting pieces of fabric three inches wide and as long as the armoire opening. I folded them wrong sides together, lengthwise and ironed them flat. I sewed one to each original piece of fabric as a hem. I ironed and topstitched the seams and slid the curtains onto a small tension rod. I put the rod at the top front of the armoire and, voila! Curtains.

I made some long fabric ties to match the curtain hems and screwed cup hooks into the sides of the armoire for tieback holders.

I put a second rod in the back, halfway down, for a clothing rod.


 The middle child was ecstatic-she ran and got clothes and even the accessories and filled up the armoire. McKenna was also very pleased.


Now if only she had a place to crash.

Aha! I got that!

The problem with the smaller drawers was the width. The design and length were great, the height was not a problem, but the width was way too wide. In my infinite wisdom, I decided to cut a chunk out of the middle of the drawer, glue it back together and move on.

Armed with my tools (I’m pretty sure Handy Manny could have done this so much faster with his tools) I pulled the drawer apart, cut the middle out of the front and back and the same amount off of the edge of the drawer bottom. I glued and clamped all the pieced back together. Noooot the best perfect fit. Pretty close though. I used wood filler, glue and sanded repeatedly. There are still visible lines in a few places, but I decided that if this were supposed to look antiqued, it would be okay.


Because the drawer front extends further than the back, I added two round wood balls as feet to the back (Pack of ten for $2.40). I did the same paint technique to the bed drawer as I did for the armoire. I’m pretty pleased with it.


For the bedding (not super detailed here but I can give you specifics if you want):

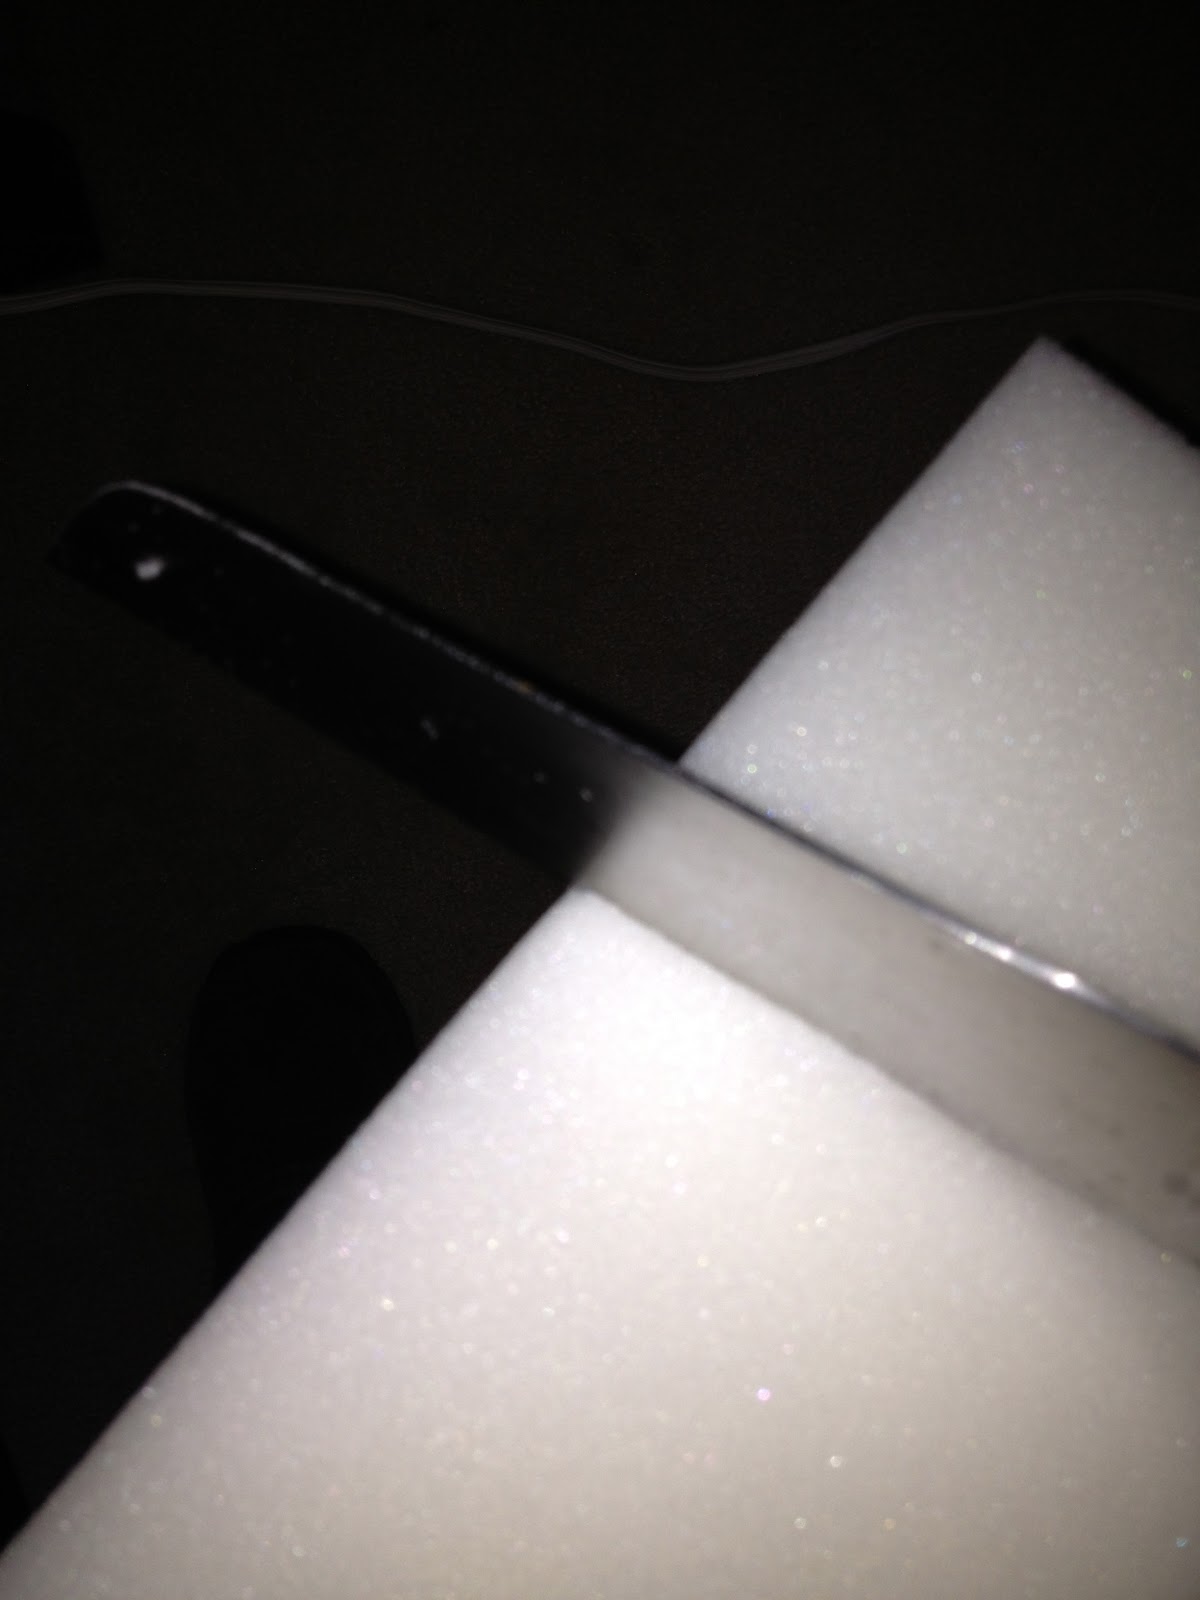
I bought a four-inch thick piece of foam at the Hobbiest of Lobbies on sale for $10.00. I measured and cut a piece with a bread knife for the mattress. I made a big fabric tube, put it around the foam and glued down the ends of the fabric.


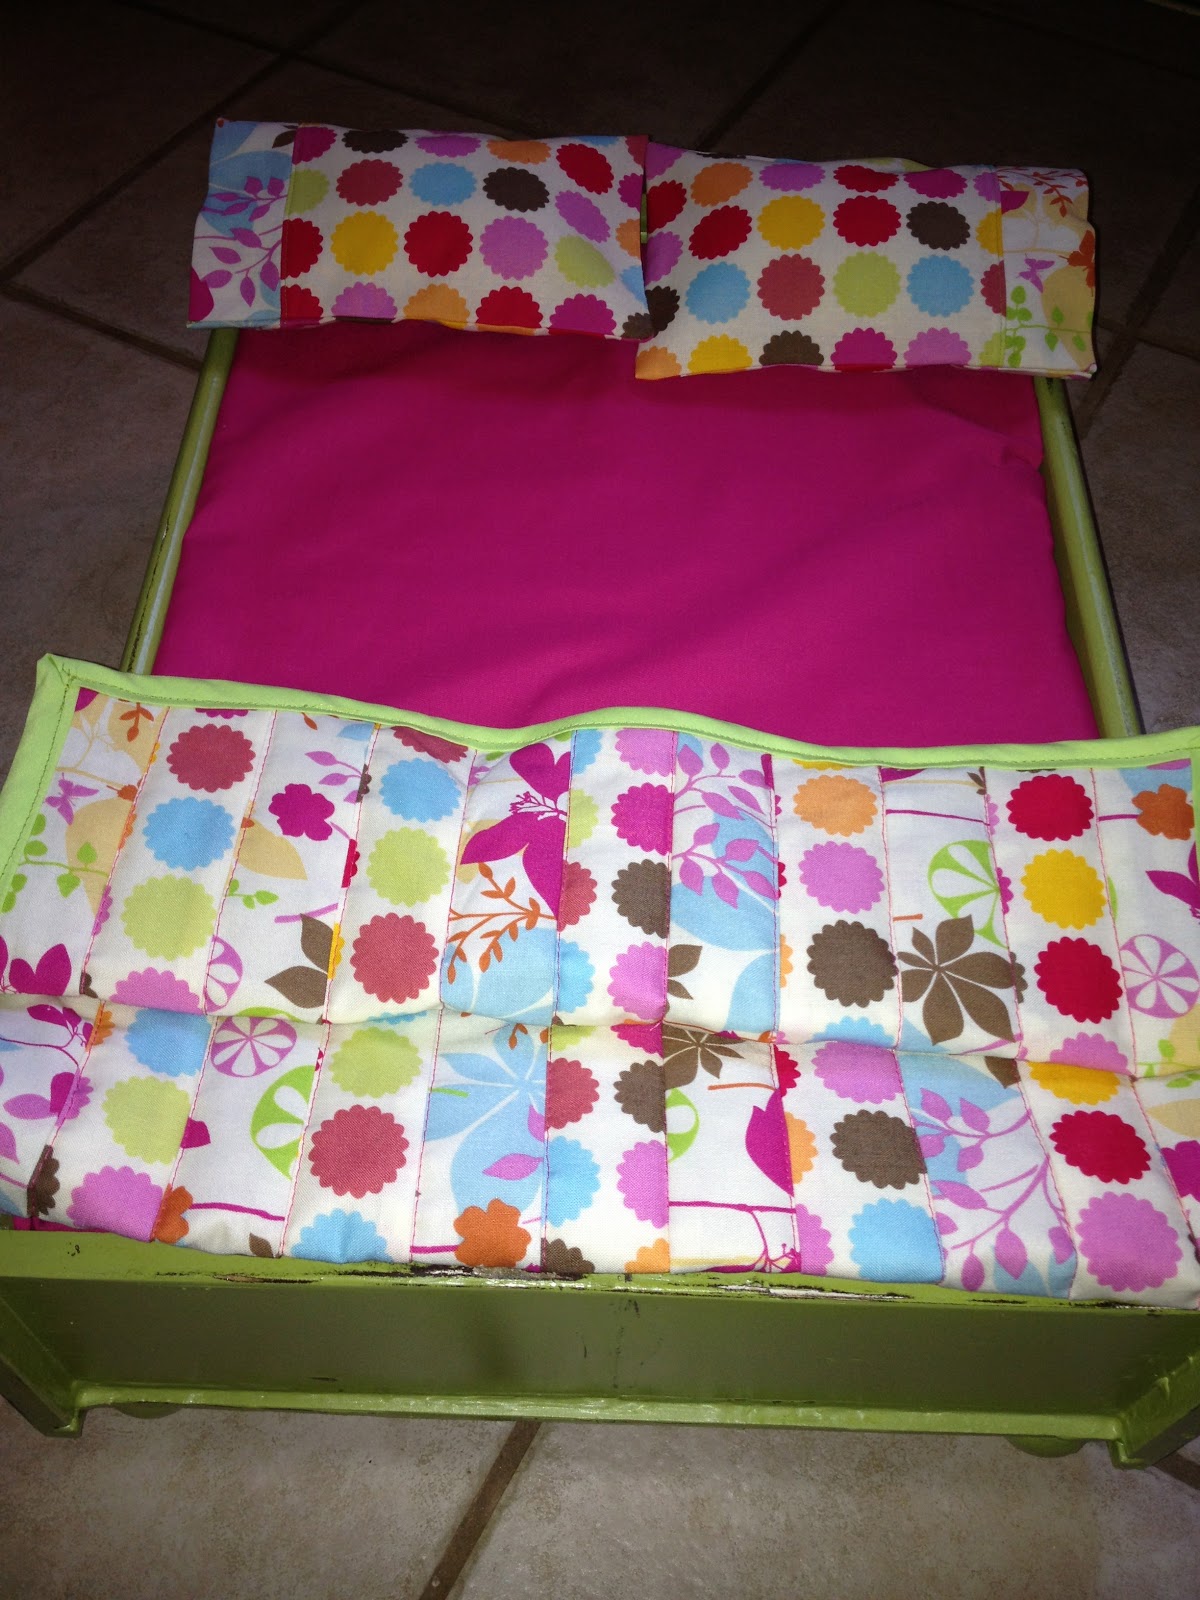
I next cut strips of the matching curtain fabric and sewed alternating strips into a quilt. I ironed it all, layered it with batting and pink fabric and stitched them all together. I used bias binding around the edges and done!


I made two small pillows out of muslin and stuffing and made cases out of matching fabric.


Total cost for both pieces:
Green latex paint-$1.00 (already had)
Brown spray paint-$5.00 (already had)
Spray polyurethane-$3.50 (already had)
Fabric-$12.00
Foam-$10.00
Wood feet-$2.40
Cup hooks-$2.50 (already had)
Tension rods-$3.50
$27.90 in new materials.

$39.90 if I had to buy everything.

Finito!


Tuesday, March 19, 2013

Ramble On-Trash to Treasure: Part 2 (Sort Of)


Some people would look at me and say I have ADD or ADHD. Okay, nobody would look at me and think ADHD. Hyperactivity and me is like Eeyore and Zumba-it just doesn’t go together. I think they would say I at least have “Creative ADD or ADHD.”

I am not trying to disrespect, belittle or minimize anyone who actually has ADD or ADHD. I truly feel like I have a huge focus problem when it comes to creating. Ask my friends whom I recently joined on a crafting retreat. I was in the middle of one project and saw a cool piece of fabric and started making an American Girl sleeping bag. Seriously? Focus! I looked up “creative ADD” online out of curiosity and found, to my surprise, pages of entries about it.

Now I have my medical degree, as my Padre says, from Wal-Mart, but I’m happy to see that there is a legitimate dialogue on this. Apparently, you can have the focus issues, daydreaming, procrastinating (ummmm, I promise I will clean house tomorrow) etc., and seem like you have ADD or ADHD when really you are just a creative person.

Also, many kids and adults are misdiagnosed with ADD or ADHD because they are simply creative and can’t rein it in for a typical setting. I thought something was killing my focus. I guess it is just who I am! I also read that some people have both-creative personalities and ADD or ADHD.

On WebMD (obviously the highest standard of quality medical advice) I found this quote from a doctor (a real one, not a woman who plays a doctor on TV or stayed at a Holiday Inn last night):

“Clearly, creativity and ADHD are not the same, but they do have some behaviors in common, derived mostly from what San Diego child development expert Lucy Jo Palladino, PhD, calls a ‘common shared pathway,’ or similar neurological chemistry, within the brain itself. ‘This means the behaviors can manifest with a similar appearance, but there are very different reasons behind their cause,’ says Palladino.”

Reading further into these articles, I think I am just the undisciplined creative type, and not a person living with ADD or ADHD. But to see the link and the similarities and find some focus techniques that could help me was refreshing. I usually write off my disorganization as forgetting to take my thyroid meds or lack of sleep, but maybe it’s just who I am.

I do feel like maybe I get those kids who just can’t sit still and listen to what everyone else can listen to, or see a math problem in a completely different way, solving it with the correct answer, but getting it marked wrong because it was worked wrong. It is frustrating. Being shoved in a particular box is frustrating.

Okay, see how this “opening paragraph” about disorganization has morphed into a whole blog about ADD and ADHD?! Seriously. This was supposed to be “Trash to Treasure: Part 2” where I discuss the raised beds I made from drawers and doors. Blah, blah, blah. Get a handle on it, Evans!

Okay, I can salvage this blog post like I salvaged these drawers. My problem currently (aside from the obviously HUGE focus thing above) is that my garden is too small. At 10 x 14 feet, I don’t have the room for sprawling plants.

There was a part of the yard below the garden (the garden is up above a retaining wall) that used to be grass, but is more unused space than anything else. I decided to take it over. Not having the time, money or desire to dig in tons of compost, soil, etc. and build big beds right at the start of planting season, I opted to use the excellent free materials that were cluttering my garage.

While it has been pointed out to me that these former kitchen drawers and doors aren’t treated for outdoor use, and may fall victim to bugs or weather, I really wanted a temporary solution for this season without having to go spend tons of coin on new lumber. I will be watching them for signs of infestation and hopefully this fall, I will have a long-term solution for this part of the garden.

Two of the drawers were pretty big-nearly 24” x 36” x 10”. I cut the bottom out of one and stacked the frame of that drawer on top of the other to make a 24” x 36” x 20” box.

I used scrap wood to brace the two drawers together on the inside, screwing the boards into both drawers. On the outside of the drawers, I screwed cabinet doors onto the front and back to add a decorative finish and further stabilize the box. So sorry I didn't photograph this part!

I drilled holes in the bottom of the box for drainage and stapled landscape fabric on the inside to cover any little cracks where dirt could fall out. At this point the hubby had to schlep the box to the backyard because it weighed a metric ton.

I took two other, shallower drawers and placed them as a base, filling them with soil. I left a space in between the drawers for circulation, drainage and to allow the drawer to stick out the sides of the larger box. I put the larger box on top, and filled it with compost, soil and humus. The garden kind, not the chickpea kind-that kind has two ‘M’s.

Next, I took four cabinet doors. I arranged them in a square shape on the driveway, screwing the ends together as I went along. I took that frame to the yard and filled it as well.

I tossed in some good ol’ American earthworms for kicks and got ready to plant.


Disclaimer: While building these garden beds, I neglected housework for about a week. In the interest of full disclosure, you can’t do it all. You just can’t. And making stuff is more fun than cleaning stuff. Really, folks. I did clean toilets and the kitchen because, as an adult, I have to. I did, however, get caught in my own insanity and bounced between this garden bed project and painting the eldest child’s bathroom and making matching girl/doll outfits for the younger two, and making three quilts… I am so the dog from UP!

“SQUIRREL!"

Anyway, back to the garden before the last few people stop reading.

I added plants that I thought would stay containable. Two pepper plants in the tiered box, backed by a row of sugar-snap peas. I added a few climbing elements for the peas, and before the pepper plants get really big, the peas should be done.

In the lower tiers, I planted herbs. They can sprawl out and their roots can fill the dirt in the rest of the drawers that are covered by the big box. I think that will be perfect for them.


Close-up of pea sprouts
In the large box made from doors, I put in eggplants, peppers and basils. Yum!


I will add a drip line to each box this week to make sure they get enough water. Being in containers, I will need to make sure the plants don’t dry out. I’m excited to see how this new section of our garden evolves. Who knows, in a few years we may have no grass left in our yard!

Next blog will be mostly about the doll furniture from drawers. Not psychobabble. I promise. 

At least I’ll try!

Friday, March 8, 2013

Trash to Treasure: Part 1

Our garage is starting to look like Sanford and Son. So much, in fact, that I actually hear this in my head when I walk through the garage:

Bum bum bah da-Bum bum bah da da da da,
Bum bum dah da-Bum bum dah da da da da,
Bum bum bum bum dah da da da da-da dah!

You know you just started singing it!


And, yes, our garage really looks like that right now-hence my industrious streak!

The reason we could assemble a Les Mis-worthy barricade in our garage is that I have spent many post-employment hours on Pinterest and have all kinds of great projects I want to do. Many involve pallets, wood spools and shutters. Which is perfect, because I keep finding or acquiring pallets, wood spools and shutters. And wood cabinet doors, and crates, and drawers…aaahhhhhhh!!!!!

That last exasperated cry was the sound of my hubby. At least in his mind. I decided that out of respect for him and our garage square footage I would start converting some of this “trash” to treasure.

*Note here. I do not steal this stuff. I ask. It may be by the curb, behind a business, in a field. I still ask. Every time. I never take without asking. Never. All someone can do is say no, but if you walked off with that nightstand by the curb and it was destined for a charity, you just stole it.

Soapbox (properly obtained) complete.

We are amassing a salvage yard for several purposes. The first is that I was charged with turning a room in our church into a literal disaster area for our Confirmation Mission Experience, which emphasized the work of UMCOR, the United Methodist Committee on Relief.

Our church hosted hundreds of kids from around the North Texas Conference, and as part of the day they made a trip through our mission area. The first place they encountered was the “disaster” room, which was decorated to look like a home that had been through a hurricane or tornado.

To set this space, I had to locate, borrow or acquire broken, old, beaten, and used items. I lucked out when a nearby house was being gutted to the studs. They had just torn out the whole kitchen and said I could have tons of drawers, shutters, doors and cabinets. They even let me borrow a sink they planned to reuse! Bonus!

Adding fabric, plants, photos, books and papers to the mass of wreckage really helped finish the look. Our great confirmation small group girls chose the setup of this event for our group’s mission project. The awesome Communications ladies at church printed a giant mural to hang in the room as well. Look achieved!

"Yea, SWAG girls!"
"Entry to Mission Experience"
After the kids passed through the disaster room, they were able to run relay races, filling relief buckets one item at a time. The groups then moved to the next room, where they actually stocked relief buckets for use by UMCOR. Finally, they arrived at the Coup de Grace: the disaster simulator.


Earlier in the week, I built two 4’ X 8’ plywood platforms and mounted 10 large casters under each. I put handles on the top for our “shakers” to use. One platform was put in each of the two simulator rooms, which have projection screens.


We placed a long table on either side of each platform and stacked towers of boxes on the tables. We hung a black curtain in the doorway and the lights were dimmed. The kids (5th-7th graders) filed into the rooms about six at a time. They climbed on the platforms and waited. Guys under the tables were ready to grab the platforms, and other folks (shout out to the masterful Amy!) manned leaf blowers and water spray bottles.

At the right time, videos started on the big screens of howling hurricanes and thunderstorms, the leaf blowers started blowing boxes on the startled kids, and the platforms shook. Water was sprayed on them as boxes rained down and the lightning flashed. It was pretty awesome.

After leaving the simulators, the kids went to a debriefing session with an UMCOR representative.

All in all, it was a successful experience. The kids seemed to get into it and learn more about the UMCOR process. And never underestimate how fabulous it is to shake, spray water, and blow boxes onto a bunch of tweens. Cathartic, I must say!

After the cleanup, I found myself with about 12 drawers of varying sizes, six shutters, eight cabinet doors and a whole slew of Pinterest ideas. I have been cruising through the projects in the last couple of weeks. Below are some pics of what we’ve made. I have spent $10 on clear polyurethane and $15 on soil in total for all of these projects. The rest was using up what I have around. I will go into detail on each one coming up in parts 2, 3 and 4 of the "Trash to Treasure" series here. Oooohhh, I have a series! For now just a teaser!

"Large sign for, where else? Over the front door!"

"Cabinet to hang on girls' bathroom wall for hair accessories."

"Raised garden box to expand our garden-making several of these."


More Hijinks...